NCR Black Swamp Division (Div 1) Officers
Superintendent - Marshall Stull Assistant Superintendent - Brian Burr Chief Clerk - Ray Huber Treasurer - Randy Bosscher Trainmaster for Services - Steve Glass Director At Large - David McMullian Director At Large - Tony Kukwa
Appointments and Helpers
AP Program - Ron Gilbert Editor/Webmaster - Marshall Stull AV/Computer Support - Steve Glass AV/Computer Support - Steve Richwine New Member Outreach - Open
We Need Help!
We need stuff for the Train Order! Please submit any article/photo/information to the editor. any kind of information is great, please tell us what you are up to!! Even if it's just a photo of your layout, something you saw, or what's on your worktable we would love to see it.
Sharing is the best way to spread the hobby and ideas.
Our mission is to promote education and fellowship through the sharing of information and the promotion of the world's greatest hobby. - Model Railroading.
From the Editor

Wow! November already! The holiday season is upon us!
We again have articles from some of our most experienced modelers in this issue. Ray starts us off with tales of how he rescued an old locomotive from the parts bin. Larry then takes us on a journey through the earlier days of railroading and gives a firsthand account of some of the workings of the railroads. A BIG THANKS to Ray Huber and Larry Hickman for providing great stories and adventures.
WANTED! - Photos and Articles for the Train Order!! New content is always needed, and new thoughts and ideas are the best. Even new twists on old ideas are great. Maybe you have a certain technique for ballast or car maintenance or a locomotive you just upgraded. Send a photo and a small paragraph. It does not need to be professional, just jot it down in an email and fire away. Any content is welcome. Email any content or ideas to the editor at blackswampdiv@div1.ncrnmra.org.
View from the Cab
Welcome to November! The holiday season(s) start this month including Michigan Deer Season (Rifle). Dawn came with a bang here this morning and there was no doubt what time of year it was.
We had a few announcements to cover in the October meeting. For those who missed it, beginning Jan. 2025, the NCR Hot Box will be available in digital format only. It will be available on the NCR website (ncrnmra.org) in PDF format. Emails will be sent to all NCR members notifying them that the monthly Hot Box is available on the internet. SPECIAL NOTE: If you don't get the Hot Box email, you may to update your email address on the NMRA national website. Just log-in on the website and you can update your information.
We have added a new agenda item called Question/Answer. Members may ask or get advice from the membership on any issues or techniques they wish to know about. We have a lot of talented individuals and you can be sure, someone has done it before or had the same issue. Help is here, you just have to ask.
Modeling Challenge! - 17 members requested kits for our kit build challenge!! Dave has confirmed that the kits will be here for the November meeting, so if you joined the challenge, please make every attempt to join the meeting and collect your kit. As a reminder, receiving the FREE laser structure kit, we expect you to return to our February meeting where we will each show what we did with the kit. You do NOT have to build it as intended. You can bash this anyway you see fit. We are looking forward to seeing what everyone does. THIS IS NOT A CONTEST!! This is for fun, to learn, and push our skills.
December Holiday Party - We will have our holiday party on December 20, 2024. We will be discussing options at the November meeting. Last year were catered by Tony Pockos, this year we can do something a bit different and will discuss options at the November meeting. If you can't make the meeting and want to provide ideas, just reply to this email with your thoughts.
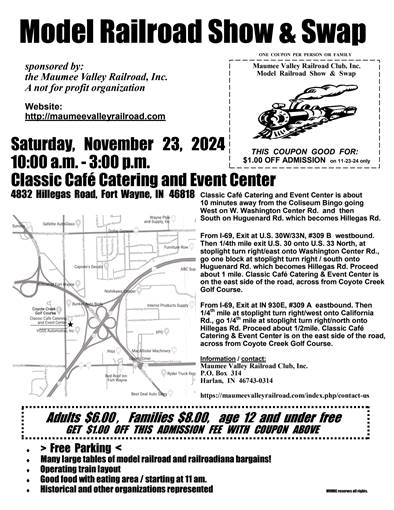
Saturday Open House - This months open house (November 23rd) will be at Michael Finkler's PRR Toledo Division. Mike hosts regular operating sessions and includes local industries like lime plants, Outer Yard in Toledo, downtown Toledo. See the information further down for exact times for the open house.
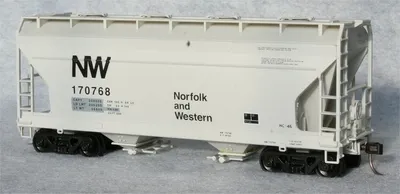
HO N&W HC-46 ACF 2-Bay Covered Hoppers - The Mid Central Region (MCR) to our South has N&W HC-46 ACF 2-Bay Covered Hoppers for sale at very reasonable prices. Using Accurail's 2200 Series ACF 2-Bay Covered Hopper as the basis, MCR is offering it in a Norfolk & Western repaint scheme. These cars are N&W class HC-46 and are from an original batch of fifty built by in 1966 by ACF with the Round Herald paint scheme. Subsequently some cars went through a general maintenance program and were repainted in the block N&W livery. For more information and ordering instructions, see the website at https://division7mid-centralregionnmra.godaddysites.com/car-projects.
I look forward to seeing everyone at the meeting!
Marshall Stull,
mstull@marshallstull.com
Superintendent
Clinic Corner

The clinic for November will be presented by Ray Huber. Ray will be transforming an old "junk" caboose into a new piece of rolling stock. From a new paint job to adding in some electronics. Be sure to join us for the November meeting.
See you there,
Brian Burr,
Assistant Superintendent
November 22nd Meeting Agenda
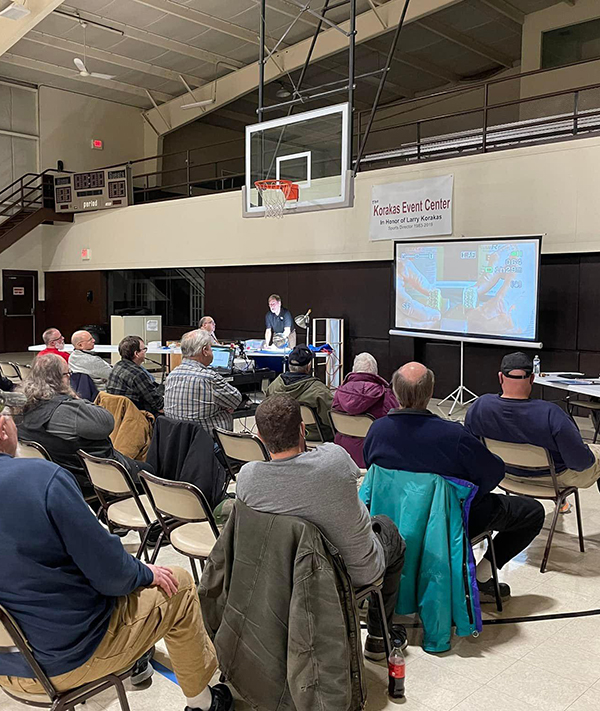 Here is a quick breakdown of what to expect at the meeting:
- Rip Track Table - Have items you want to sell or just give away? Put them on the table
- Business
- Question/Answer - Ask our members about anything
- Show and Tell - whatever you want to share
- Break
- Door Prizes
- Clinic - Caboose Rebuild
- Closing Remarks - Announcements and Open Discussion Points
Layout Open House November 23rd - Mike Finkler's PRR, Toledo Division
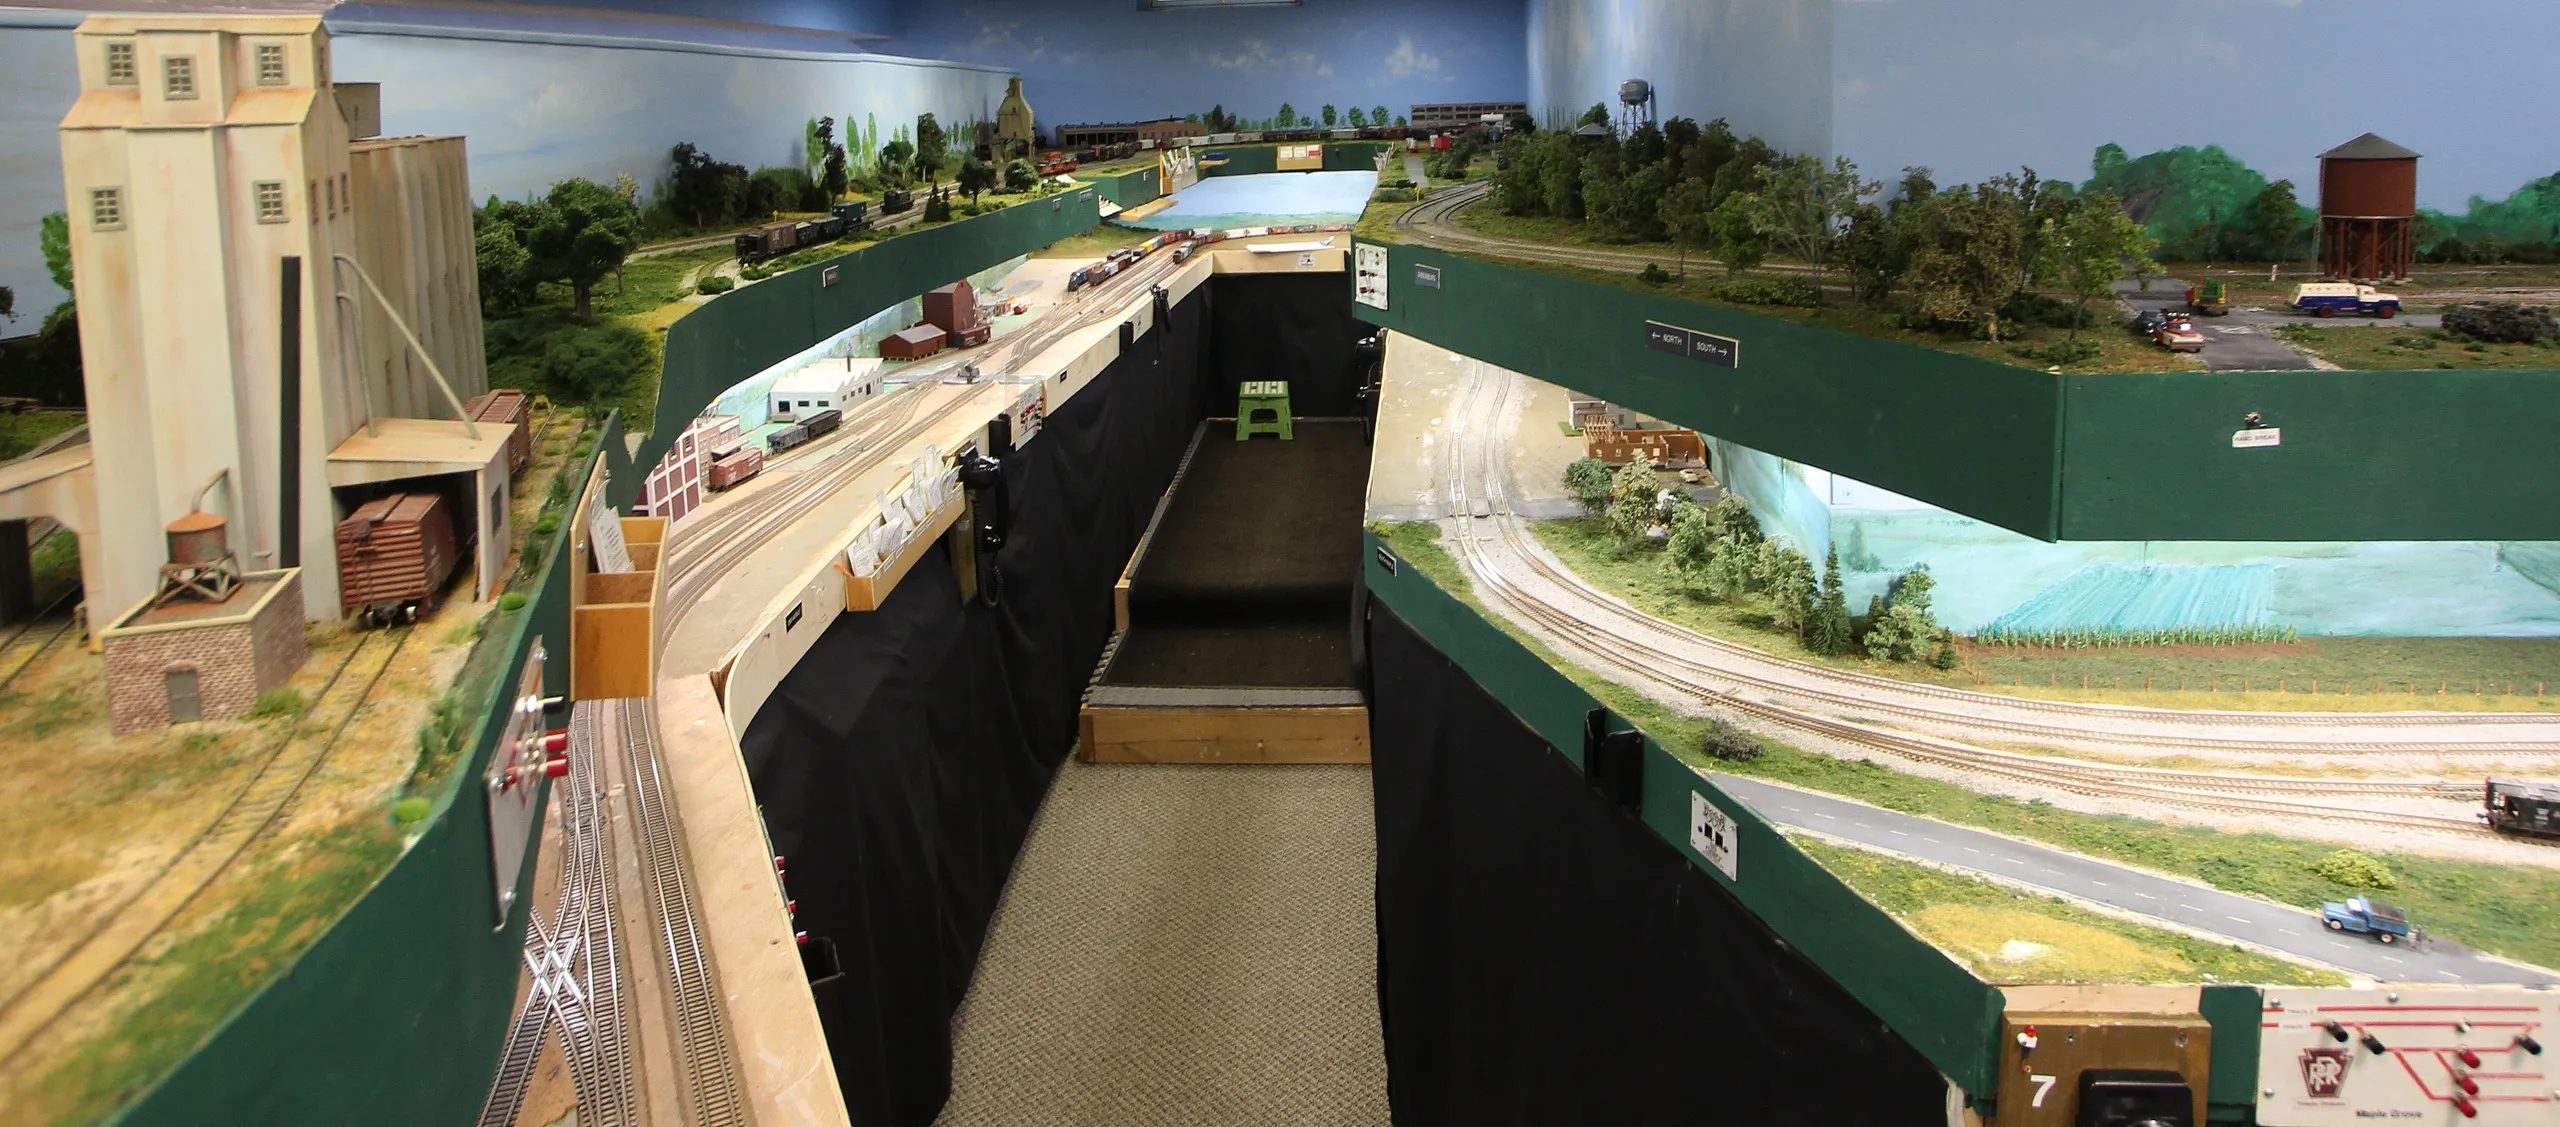
This month's open house will be at Mike Finkler's. Mike's layout is HO scale and features the PRR Toledo Division in the 1950s running from just west of Mansfield, Ohio to Detroit with a branch line from Columbus Ohio to the docks at Sandusky Ohio. The modeled portion of the Toledo division runs from Carrothers, Ohio where the branch line from Columbus crossed to Sandusky. Staging on the lower level represents Detroit, Cleveland, Columbus, Pittsburgh and Chicago.
Mike Finkler
208 Forest Glen Dr
Holland, OH 43528
November 23rd
Hours: 10AM - 2PM
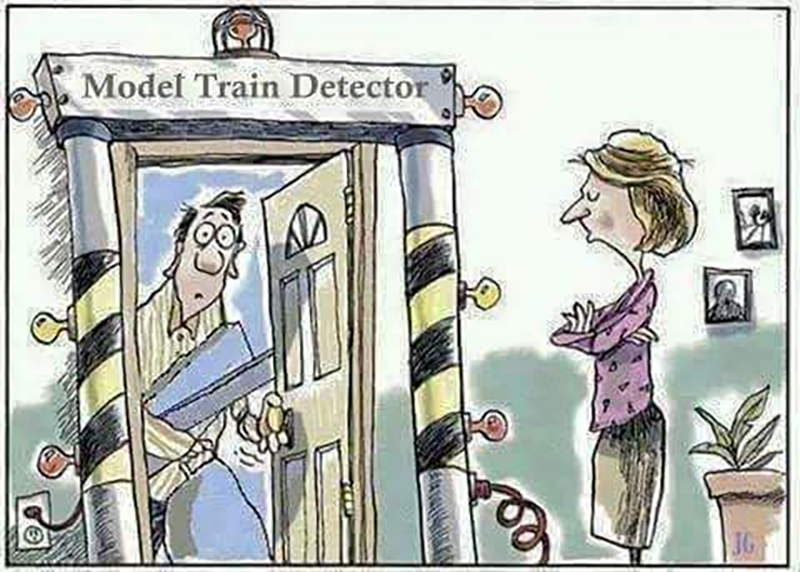
The lighter side of the hobby
October Meeting Highlights
The following items were brought for Show and Tell in October;
Randy Boscher talked about track and wheel cleaning. He has investigated several different kinds of cleaners and has come to the conclusion that Lacquer Thinner is the best for track cleaning while Menthol Alcohol can be used for plastic parts; wheels, etc.

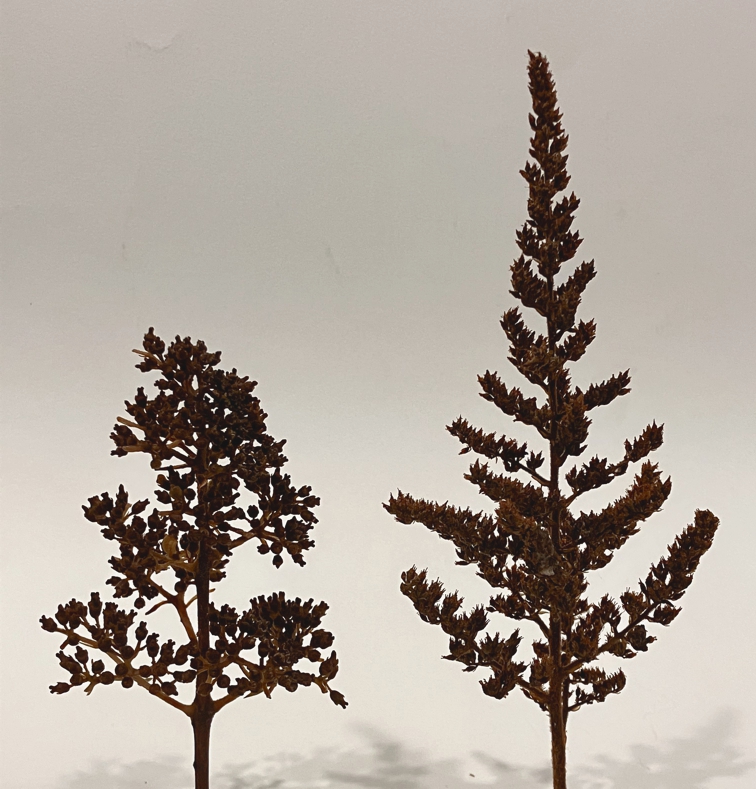
Dave McMullian told us about using Hydrangea cuttings (a flowering bush) to make trees. To make Pine trees, he suggested using Astilbe flowers that when dried, takes on the shape of a conifer tree. He also shared a formula using 1 part Glycerin to 2 parts water to soften and keep plant material from becoming brittle. He plans on experimenting with White Glue and water next. Dave also gave us an update on the Boston & Maine, Yankee Flyer passenger train he is building using the 3D printing process. The detail shown/produced is exceptional and all the parts fit! Hope to be done by years end.
Rescued - by Ray Huber
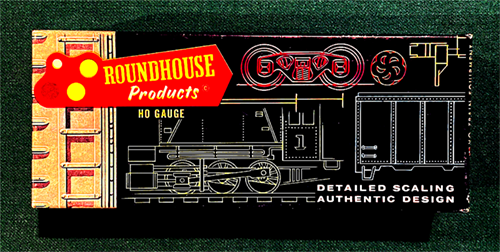
Some people rescue animals, I rescue old broken model railroad stuff! In this instance, it was an old Roundhouse Diesel Electric Box Cab. This old locomotive has been on and off my layout so many times for repair that I put it away, almost in the trash bag, because of its poor performance.
This all started in July of 1966, in Detroit, MI while I was working for the New York Central Railroad. The boss came to me one day and said, we've got a hot project at a local manufacturing facility (the US Rubber Plant if I remember correctly, located somewhere just off Jefferson Ave. and up river from downtown) that needs to be done ASAP. OK, I said, "what's the problem?"
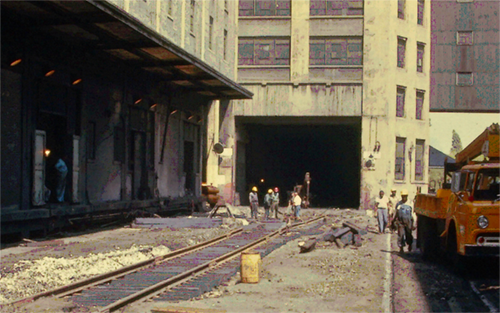
"For starters," he said, "there have been too many derailments at the plant due to an old #6 turnout that leads to one of their loading docks and the new longer box cars can not handle the reverse curve caused by the #6 turnout that was installed when the plant was built (circa 1930's).
We need to replace the #6 with a new #8 turnout and as quickly as possible. Yes, the track inside the plant is private, but the Railroad has a policy; if you want us to run our trains on your track, then your track must be to our standards. Needless to say this situation spelled time and money for the Railroad as well as down time and money for the Company.
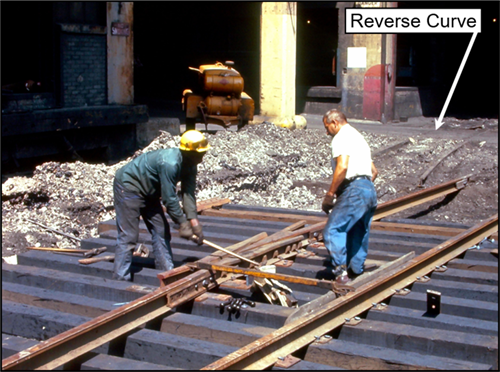
We were given less than two weeks to get the job done which meant some long days and into the evenings on some occasions. Since I was already staying in a motel for the week, this was not a problem,.. with one exception. Up to now, I worked with my good friend Don who went to work for the NYC the same day I did. We always enjoyed having dinner together, sharing experiences after the day was done. However, Don had been reassigned to another part of the System and that's where this story begins.
Now I was on my own after work. I started looking for something to do rather than just sit in a motel room all evening watching TV. Suddenly, the thought occurred to me that there might be a Hobby Shop somewhere in the Detroit area that I could visit. Out came the Yellow Pages (remember those) and to my surprise there were several, and one not that far away. As it turned out, it was a Joey's (not sure of the spelling) Hobby/Train Store. I often wonder if they are still in business.
After browsing through the store, on more than one occasion, and marveling at the amazing amount of inventory they had, I zeroed in on 2 small locomotives made by Roundhouse and displayed in their showcase. Now I had two choices; one was a 0-6-0 Tank Type Engine, the other a Diesel Electric Box Cab. After some debate, I finally decided on the Box Cab just because it was small and that's what I was looking for. Happy with my purchase, I headed back to the motel looking forward to the next day at the job site.
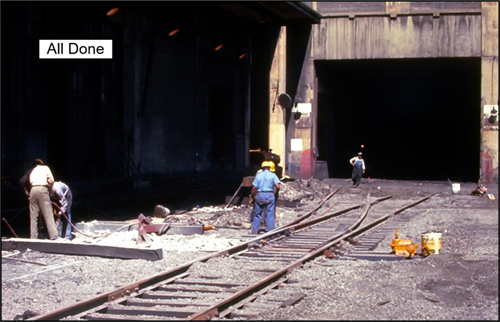
Long story short, the project was finished on time and I was off to other parts of the System. My new assignment, although still in Michigan, was much closer to home. So close, it was only an hour's drive from home. This finally gave my some time at home with the Wife and friends. Now, it was time to test my new purchase.
From the get go, I realized that maybe I was a bit to hasty in my selection. Problems developed right out of the box and plagued me every time I tried to get it to run. It ran very slowly when it did run and was very erratic at that. By now it had a paint job and was lettered for the Toledo & Maumee Valley RR (my free lance Railroad name) as #4510 on my locomotive roster. However, I soon got annoyed with the poor performance and considered the purchase as, "money down the drain." Into the Junk Box it went and there it stayed for at least 30 plus years.
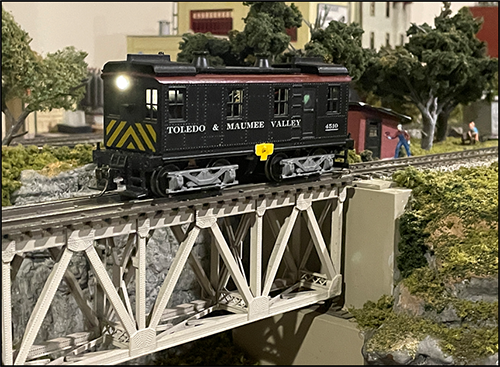
One day about a year ago while cleaning out some stuff, I came across that old Box Cab and thought to my self, "Self, do you suppose you can get it running again?" By now I was retired with time on my hands and the DCC era had made its impression on the Model Railroad industry. This gave me inspiration to try again. Well, I did using this new technology and much to my dismay, nothing changed. Still a "junk box" case! This time I said, "Now wait a minute, this is nothing more than a small mechanical device with a problem, and I know I can find and fix that problem". After a couple of DCC decoders and numerous take-apart/put-back-together sessions at the workbench, I was still no further ahead. "This is nuts," I keep saying, and started thinking back over many previous evenings at the workbench.
Thinking back, I began to see and remember some of those workbench sessions. During one session I tested the motor on the bench and it worked just like it was designed to do; low voltage-low RPM, high voltage-high RPM and very smooth. I put the motor back in the cab shell and we still had problems. I even made sure that there was an electrical pick up wiper in contact with each wheel. Again, some help, but not the answer.
I keep looking for decoder wires shorting out, broken, or getting caught in the gear train - nothing! So why was it so jerky when power was applied? What have I done recently to cause that problem?
At my wits end, with nothing else better to do and for no earthly reason, I tried to turn the motor armature with my finger while it was still installed. At first, it did not move! Trying a little harder, it began to move. OK, why is the armature so tight in its frame? Let's loosen the motor mounting set screw and see - Bingo! The armature was free and turned easily and I had, I thought, an answer. However, I had a very lose motor wobbling around in the motor pocket of the chassis - not good! On closer inspection, I noticed the set screw used to secure the motor to the chassis actually passed through the mounting hole of the open frame motor and was bearing against the surface of the armature. In other words, the set screw that was holding the motor to the chassis was also keeping the armature from turning. Removing a small portion of the screw shank, the rotation problem was solved. However, I was not convinced that this was the solution to the whole problem because we still had a very sluggish motor. What else had I done that might cause this problem?
Thinking back, at some point I did replace the old plastic tubing they used to join the motor shaft to the worm gear shaft - no big deal, or so I thought. I keep saying to myself, every time it ran a little, "this thing acts like there is a bind somewhere." I can't tell you how many times I said that and forgot about it in the same breath.
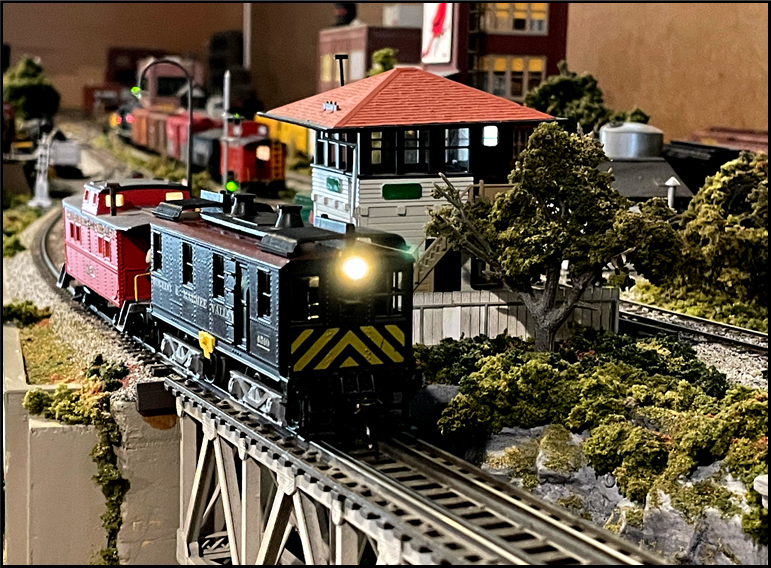
Time to look closer I said and sure enough, I discovered that the new tubing just used to replace the old one was a tad to long and rubbing against the worm gear shaft support. This one small detail was just enough to cause a bind until the voltage got so high that it broke the bond and heated up the motor - another not good! One more take-apart, and I removed just enough plastic tubing to clear the support frame and we had a free turning drive train. WOW, what a convoluted trip this has been!
By now you would think we had all the problems solved. Not quite. No matter what voltage I programmed into the newly installed decoder, the speed was still very slow. This really bothered me until I woke up to the fact that this is a switch engine and it is supposed run slow. OK, but why so slow? Remember I said a while back, this is nothing but a mechanical device. Well right there in front of me was the answer - gearing! This engine has a small gear on the motor shaft that drives another small gear that drives a much larger gear that turns the wheels. This means the gear ratio is such that it takes many turns of the motor gear to get one turn of the wheel gear. The result, even though the motor is turning very fast due to a high voltage input, the gear that drives the wheels is turning at a very slow rate. This results in a very slow realistic speed ideal for switching cars in an industrial area and that's how it was supposed to run. Somewhere in here, there is a lesson about patience.

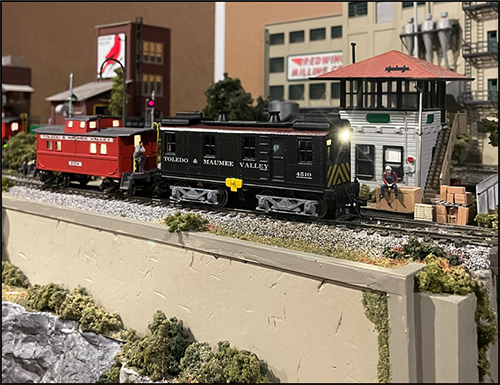
My little 4510 now rides the rails on the layout and has done some switching chores for me. It's only taken 57 years to get there, but get there we did!
Thanks for your attention and just remember, no matter how long it takes or how arduous it is, Model Railroading is Fun!
OBSERVATIONS - by Larry Hickman
Before I get into this article let me explain something. Railroading is grease, grime, rust and everything in between as well as being a dangerous occupation. Every railroader has stories of their close encounters with death, including myself. During my forty two and a half years I have been involved in accidents resulting in 6 deaths and had more than enough close calls with cars, trucks and people. At least three times I have been shot at and called every name in the book when a road crossing was blocked. Railroaders probably complain more than anyone about everything and anything. I spent more time away from home and knew more about my co-workers families than my own family. I have known many great railroaders, some in management and many from different departments. I have seen many work their lives and die before enjoying their retirement. I am lucky and still around after seventeen years of retirement. For those who would like to hire out on a railroad, It's not a job, but an occupation and your life revolves around it.
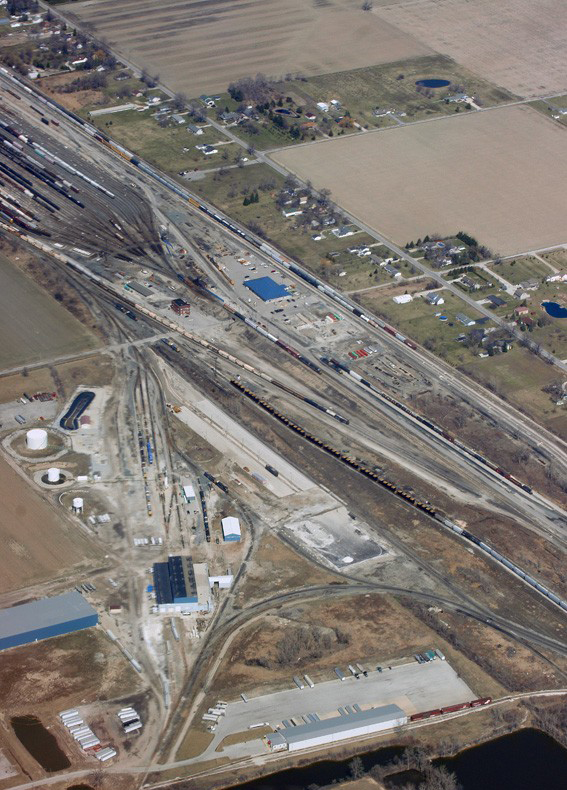
When we talk about the early days of steam what is the first thing that pops into your mind. I would guess a Roundhouse, where engines were turned, serviced and stored, until called. During this time period between a third to one half of the freight handled was for the railroad industry. When an engine arrived in Enginehouse Territory the inbound crew got off and a Hostler moved the engines over the ash pit, where the ashes were dumped. The engine was then moved onto the turntable to be turned if needed, serviced and stored, until called for its next assignment. All of this is handled through the Roundhouse Foreman having complete authority in this location and all employees working under him. He has some type of board, usually a chalk board near his desk that was updated as each engine arrived or departed from his territory. When the engine was in the roundhouse the coal was banked in the firebox and everything watched over by a laborer, so an engine would be ready when called. Engines called for trains were brought from the roundhouse by a Hostler onto the turntable and turned if needed. Then pulled up to receive, coal, water and sand and then onto the ready track where train crews would receive their engine. In some locations it was cheaper to build a system of Wyes in place of turntables for turning power. Stanley Yard had this system for turning power. It is still utilized for turning various types of freight cars by an outside company who purchased the engine facilities from Conrail. This joint use sometimes caused problems.
As steam disappeared many roundhouses were demolished or repurposed for other uses. Some were still around to service diesels for many early years. A good example of this was Pennsylvania Railroad's Outer Yard. It was still going strong back when I hired out in 1966. Overtime many were replaced by diesel facilities. In some facilities diesels could be picked up off the rail, if needed. A couple of these were New York Central's Stanley Yard in Toledo now owned by CSX and at this time is considered closed. Collinwood Yard in Cleveland also is owned and operated by CSX. On the Pennsylvania this was accomplished in Altoona, Pennsylvania, which is now part of the Norfolk Southern. Everything is basically still the same for diesels as it was for steam. The exception to this was when diesels arrived on the inbound track, a Hostler moved them to be fueled, sanded, and watered by a Laborer, while the Hostler may add or subtract engines for the next outbound train. This was handled through the Enginehouse Foreman talking with the yardmaster to determine the amount of tonnage and route. Engines were then added or subtracted accordingly. Dead engines or those needing repairs were sent to Cleveland or Altoona and were classed as boxcars. At times engines having various defects would be sent out on a Hospital Train to be repaired, put on a deadline or scrapped.
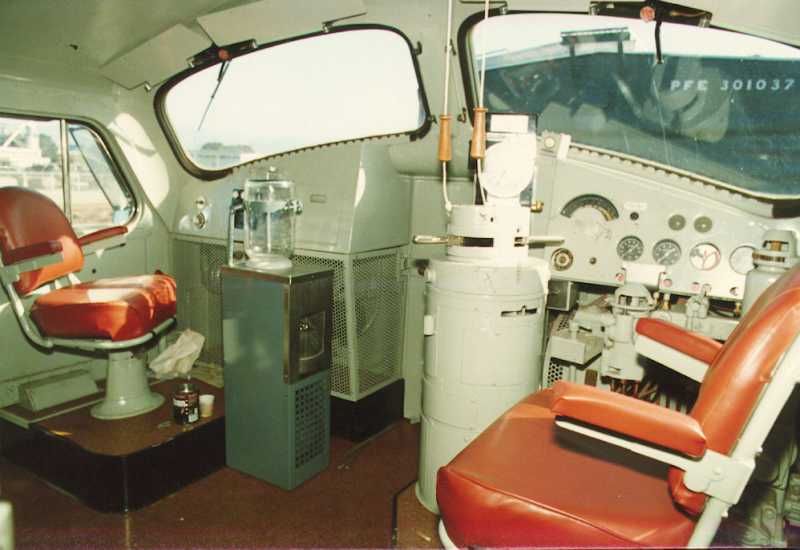
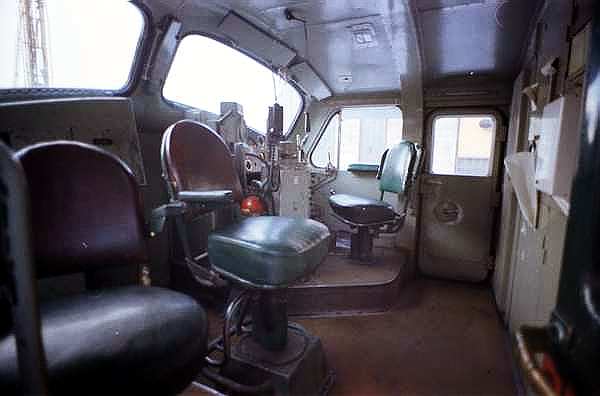
First generation diesels were noisy, hot in the summer, cold in the winter and when standing still and idling, everything rattled including the windows. Inside the engine or the right side was the control stand, where all the functions of movement, ringing tire bell and blowing the horn was handled by the engineer. Many road and yard engines still used a rope lanyard attached to the horn above the control stand. This was later moved onto the control stand, where the throttle and independent and automatic brake were located and for setting and releasing the airbrakes on engines. In front of the engineer was the speed indicator and to his left on top of the control stand was a radio that sometimes worked and most of the time didn't. If I remember the FRA in 1992 mandated all engines must have an operating radio on the lead engine. The older engines still had a deadman's foot petal located on the control stand near the floor. The engineer was supposed to keep his foot on this petal; otherwise the engine would go into emergency and stop. Most put their grip or suitcase or at times curved the extra air hose or used the red flag to hold this petal down. This gave them the freedom to move around somewhat while operating the engine. The 2nd Generation engines no longer had the foot pedal. A beeper located near the top of the cab would begin beeping as well as a light would begins to flash. The longer this is ignored the louder the beeper and flashing light. If this is not taken care of it will put the engine and train in emergency. To keep from going into emergency the engineer must ring the bell, blow the horn or hit a whisker switch on the side of the control stand.
As far as I remember only the covered wagons or the E and F class of engines made by EMD had the brakeman's chair or middle chair and was located toward the back of the cab and sat on a pedestal about a foot above the engineer and fireman's chairs. The Pennsylvania Railroad had Toad Stool Chairs on all their engines, except the above classes, which was a round stool with a back rest and no arm rest. All the other classes of engines had these chairs located directly on the cab's floor. Later with the formation of Penn Central all of these were replaced as a regular chair with arm rest, which could be adjusted for height. On many early classes of engines a partition divided the front glass into two sections at an angle, while some later classes could be seen with a solid front glass. Still later and up to the present two panes of glass were once again install for the front window with a two or three inch partition dividing the front glass. The brakeman had the pleasure of looking forward leaning his head to the left or right to see out the front window. When the middle chair sat on the cab floor on the older classes the brakeman had the luxury of having the air blow directly into his right ear when setting or releasing the air brakes. On all the switch engines I used there wasn't any toilet and the middle chair sported the words Danger 600 Volts. On the old Baldwin engines there wasn't a middle seat, but a metal jump seat that pulled down for the brakeman to sit on.
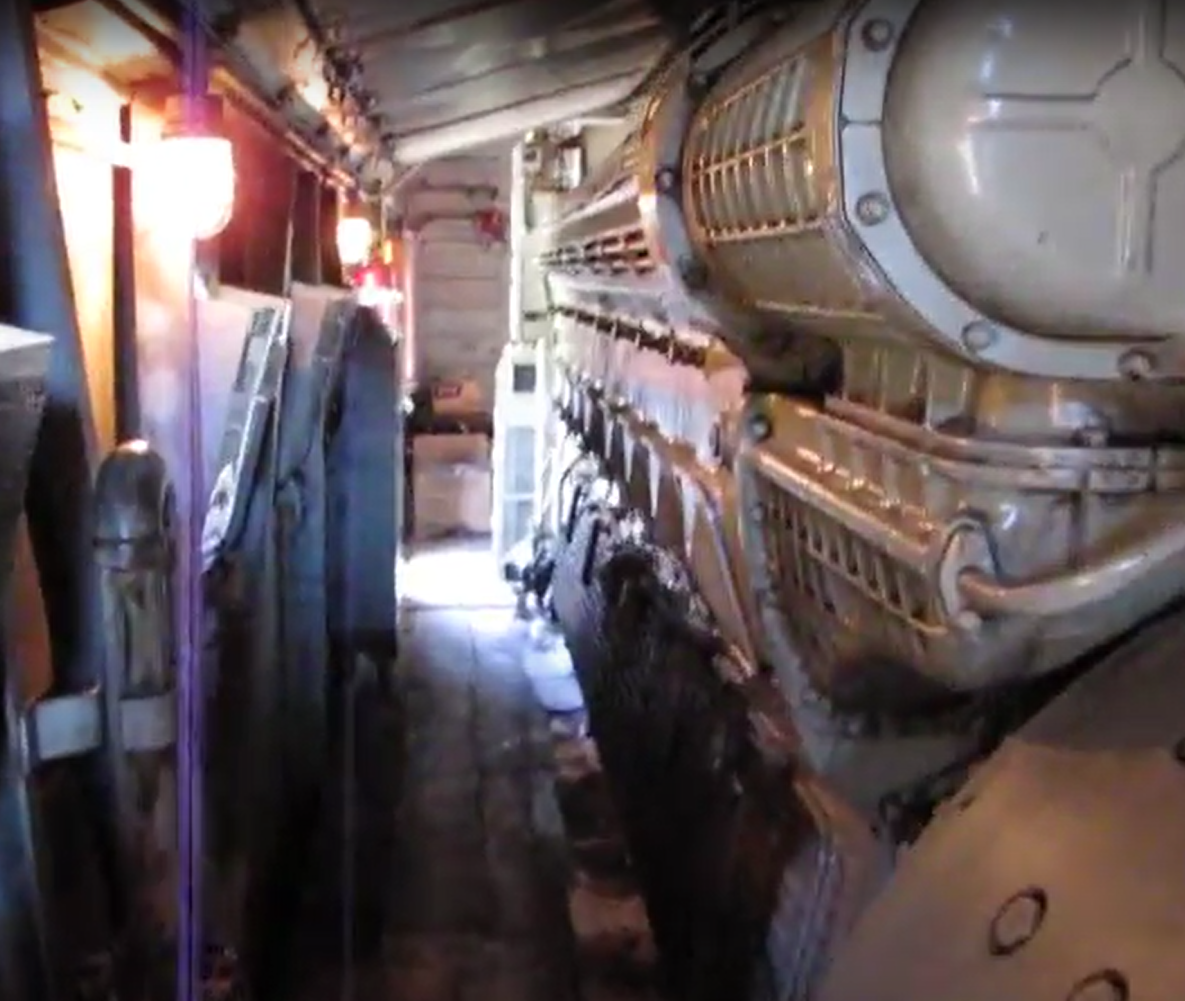
In most cases toilets were located down a few steps in front of the middle chair and behind a door. On the Covered Wagons a toilet was located in the engine compartment on the right side toward the rear of the engines. This was usually caked with oil, grease and dirt. Most were never used and only in extreme emergencies causing the person using it to squat instead of sitting. There were many times the train was stopped for these types of emergencies and everything handled in the weeds. On some road engines the toilet could be found located behind the middle seat. When running on the road and you had to pee, we just walked out the back door onto the walkway and did our thing. Many times in the older engines the toilets were not used as you had to stoop as the headroom was at a bare minimum, while the engines were moving and bouncing from side to side, so you tried not to pee on yourself. On switch engines there were no toilets. If you had to go, you stopped the train or did your thing hanging on the side of the engine or in the weeds. Later models had self contained toilets and were supposed to be dumped after each trip, but most were not and you had to hold your breath when entering. At times during cold weather these would freeze up and when you pushed the button to flush the toilet. It sometimes sprayed back at you. The 1st generation diesels dumped the waste into the middle of the rails right onto the ties and ballast. This is why you saw the sign Do Not Flush Toilet While Train Is Standing In Station.
The toilet door was next to the water cooler; where a plastic jug was filled with water and located on top of the water cooler fastened with a metal strap. In many cases the metal container holding the water was usually filled with engine sand. Many Laborers were too lazy to shut the front door allowing the sand to blow into the engine cab while sanding the engines. Sand blew into the cab and settled on the floor and funneled into the water cooler. Many times we emptied the cooler, cleaned it out and refilled it with clean water before departing the ready track. A spout near the middle of this cooler allowed us to receive water for drinking. The cab floor many times had standing water, which leaked from the water cooler and moved across the cab floor as we traveled. This caused us to move our grips or suitcases to keep them from getting wet. V shaped paper cups for water were in a holder fasten to the wall next to the front door. When the engine hit a bump and the windows were open paper cups flew in every direction, until the holder could be closed. Later models had an enclosed cooler, where ice was dumped and small plastic water bottles were inserted to be used as needed. The chair on the left side was for the fireman when they were still around. Some engines had a second chair behind the fireman for the brakeman. If you had a large fireman he would shove the seat back so the brakeman had little room for movement. A pile of rags and later paper towels, torpedoes, red flares or fuzees, red flag as well as extra air hose and air hose wrench were stored in the corner behind this chair. In the early years this wrench was called an "Alligator Wrench". This was made of cast iron and had serrated teeth on one end to tighten or loosen an air hose and they were heavy. In the later years of Penn Central these wrenches were stamped steel or better known as "Knuckle Busters." On the older engines the back panel would read "Danger 600 Volts." The older engines had the advantage of changing tractor motors. A panel was located at the back of the cab showing the various settings how these could be added or taken off line as needed.
Least I forget the two most important items. The first is the engine cab heaters. When trains or engines are moving down the right of way in the winter these were supposed to heat the cab. Well except for the old EMD Covered Wagons this usually didn't happen. In many cases these heaters only spit out cold air. Crews would stuff anything into the cracks to help keep the cold from entering the cab. Later when Duck Tape came out we covered the front door with this or wet paper towels to keep out the cold. Most of the door seals were worn out and allowed cracks up to 1/4 to 1/2 inch. Once this was done cold water was poured onto these temporary seals. Later models had side heaters which usually required the employee to hover over the top of them for a little heat when moving. When stopped the engine cab warmed up after a period of time, but as you started to move the heat was slowly sucked out requiring you to put on everything thing you had to keep warm. This was especially true going over the Bay Bridge and along the bay at Sandusky.
The other nice thing was the windshield wipers. At least during the time period I worked. These were operated by air by turning a knob controlling the amount of air for the wipers. Most didn't work properly and those that did would slowly begin to move and then stop halfway across the window requiring you to push the handle below the knob to get them started again. They would make one or two passes and quit requiring you to start them again, until you just gave up. The other nice thing about windshield wipers is many never touched the glass. In open country the wind and train speed would push them away from the glass. One thing I didn't mention was an extra board crew would be called to take engines from the yard to be exchanged for engines at an outlying point. These inbound engines were returned to the engine house and inspected according to FRA standards. This was repeated every thirty days. In later years a Laborer would drive to these locations and check everything. Fuel was brought to these locations, either by a company fuel truck or an outside vendor. At one location a boxcar loaded with sand was used to sand the engines. The sand was shoveled into a hopper connected to a compressor, which allowed the sand go into the engines. City water was used if needed at various locations and at times the local fire department may be called to bring water.
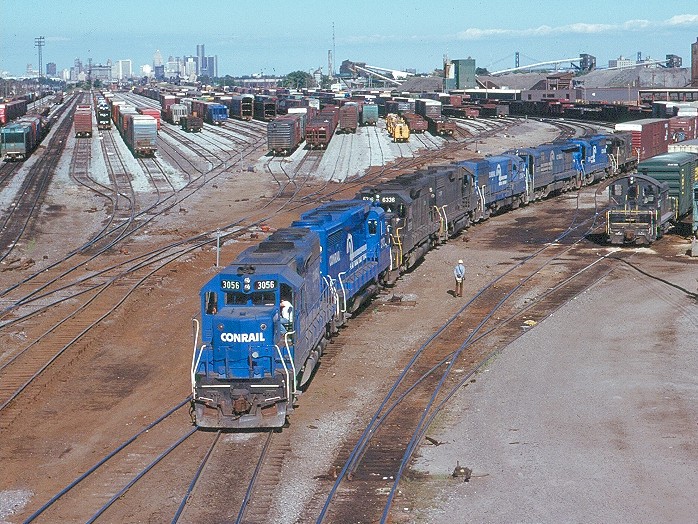
When the outbound crew arrived on the ready track the engineer would get down on the ground and walk around the engine. When the fireman was still around he would set in the engineers chair and watch for hand signals from the engineer as the air brakes were set and released. The piston travel on the engine brakes was checked and couldn't exceed six inches. The sanders were tested making sure they worked. In the winter these would sometimes freeze up requiring a laborer to unclog them before departing the engine house. After the fireman was abolished the head brakeman usually helped the engineer doing these chores. When the engineer got back on board the horn, bell and lights were tested and the proper paper worked signed and dated. The radio was tested and if working a call to the yardmaster was made for permission to depart enginehouse territory. If the radio didn't work the brakeman would go to a block phone and call the yardmaster. When permission was granted the engines departed the enginehouse. In some cases you may have one yardmaster at one end, while another could be at the other end. This depended upon the size of the yard. Before tying onto your train, which was usually on a Departure Track, you stopped at the Car Foreman's Office. This could be a shanty or even an old passenger coach. He would inform you when it was alright to tie onto your train. One of his Car Inspectors was called and walked down to where your train was located and would take down a blue flag and shut off the air to the ground line. Let me explain about a Blue Flag and the ground line. A Blue Flag is positioned to protect people working on, under or between equipment. You don't pass this flag, unless removed by the craft that installed it. A ground line is usually a pipe connected to a stationary air compressor or in some cases a moveable compressor and usually runs underground to the various departure tracks. Air is piped from this compressor through this pipe where another air hose is located. This is then connected to the first car of the train and the air is started through the train line. This is used to charge the air in the train. In larger yards a ground line is connected so car inspectors can inspect an outbound train as the air hoses are coupled together. Car inspectors start from each end of the train and meet in the middle. The ground line is set and the train is checked for air leaks. If these leaks can't be fixed the car or cars are removed from the train and set out to a shop track or designed track to be repaired. In smaller yards the engine could be tied onto these cars and a blue flag positioned on the engine not to move, until everyone is clear. An air slip is filled out by one of the inspectors denoting the amount of leakage.
Once the blue flag has been removed the engines can tie onto the train. The car inspector will give you an air slip showing the total amount of leakage in your train, not exceeding five pounds. On the road trains, when I worked before going to CSX, the air was set when the air gauge stated eighty pounds air pressure on the rear of the train. The car inspector would tell the engineer to set the brakes on the train. The brakes were set and the air was cutout on the engines and the test performed. As the brakes were set the engineer would check his watch for one minute to see how much leakage in the train line. The inspector would tell the headend crew when the brakes released. If the leakage was less than five pounds the train was ready to depart the yard. If it exceeded five pounds the leaks had to be found, repaired and another test was required. Once the air test was complete the yardmaster was contacted and the crew given a route out of the yard. This will give you some idea what went on behind the scenes before we departed the yard. Much has changed since I retired in December of 2007, so you will have to talk with the younger railroaders. Each railroad handled these problems in different ways. I can only explain what we did when I worked.
Enjoy the hobby and most of all have fun.
 Train Order